Picasso and his cubist style portraits are a popular subject for art teachers and my Grade 1 students learn about him every year. The lesson objectives focus on identifying abstract and realistic portraits, recognizing key facts about the artist's work and finally creating an abstract, cubist style portrait.
Materials required:
- A3 paper
- Pencils, erasers, rulers
- watercolours, brushes, water
- markers
- gold & silver markers
- tempera paint for the background
Duration: 3 lessons of 80 minutes each
1. I started off the lesson by introducing Picasso, where he was from and why he was famous. We talked about the meaning of 'portrait' and 'abstract'. Since this was a lesson on portraiture, I showed students about eight images of Picasso's portrait work including Portrait of Marie-Therese and Portrait of Dora Maar. I asked students to pick out anything similar they found in the paintings and they came up with things like wiggly shaped faces, bright colours, faces that were not symmetrical and eyes that looked in different directions. I had them think about why Picasso would make eyes that looked straight and sideways at the same time and their answers surprised me! They said things like "he wanted to be famous", "he was creative", "he wanted to make his work different from everyone else", and the best answer of all: "he wanted to make them look as if their heads were moving". I was so pleased! We also discussed Cubism and how he would draw straight lines in different directions.
2. Now for the drawing part. This was a guided drawing session. However, I made it a point to let my students know that they were not supposed to copy my drawing on the board. We started off by drawing a large wiggly shape for the face. Then, I had the students draw an abstract nose, eyes, mouth and hair. I drew some examples on the board and I also had a handout to support my middle and low ability students which looked similar to this, but without the dice component. I walked around the class making sure that they had all drawn out features that were big enough to paint in and relative to the size of the face. Then students took a ruler and drew straight lines through their portrait in a variety of angles. By this time we had about 20 minutes left until the end of the lesson so we began painting with watercolours. Have a look!


3. In the second lesson we recapped everything we learned about Picasso and before we continued to paint, I stressed the importance of not leaving white spaces, using bright colours and painting even toned colours. This took the entire lesson.


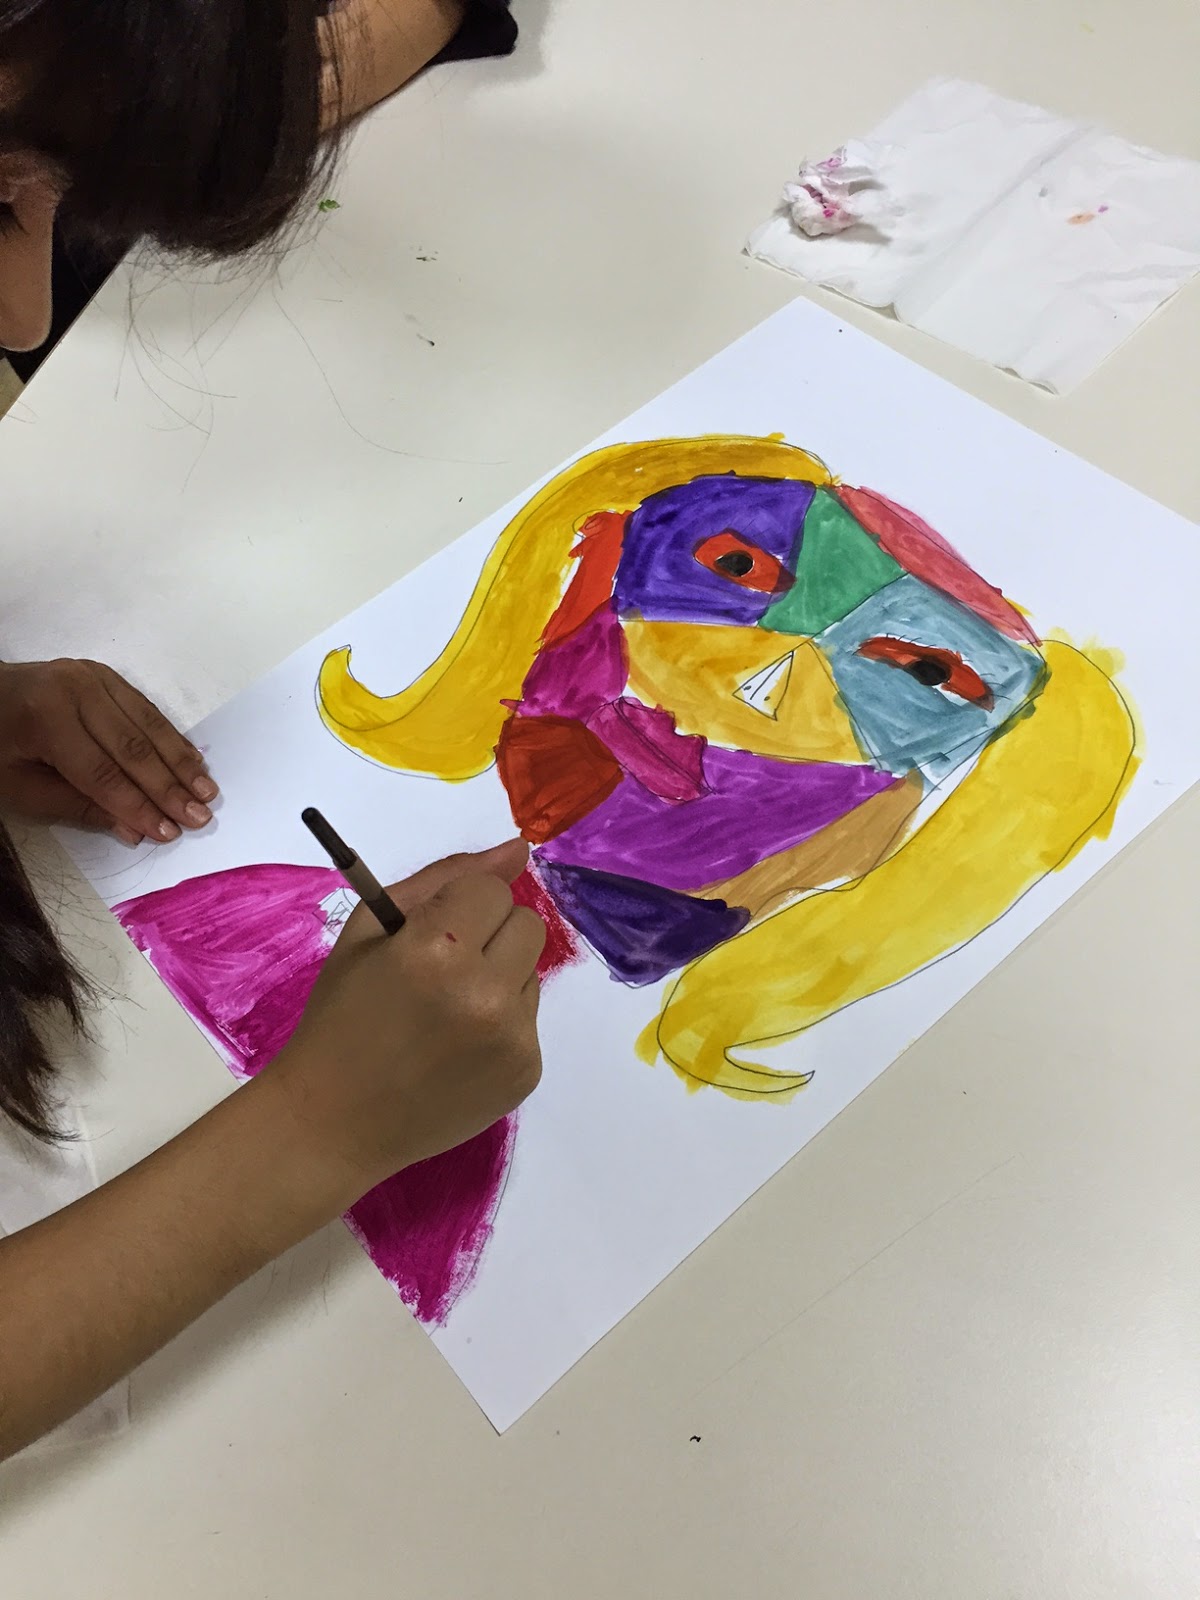
4. In the last lesson, we painted a single colour for the background using tempera paint and when that dried, we outlined it all using a black marker.
5. Then we drew patterns on the face with markers.What do you think of the results?


Materials required:
- A3 paper
- Pencils, erasers, rulers
- watercolours, brushes, water
- markers
- gold & silver markers
- tempera paint for the background
Duration: 3 lessons of 80 minutes each
1. I started off the lesson by introducing Picasso, where he was from and why he was famous. We talked about the meaning of 'portrait' and 'abstract'. Since this was a lesson on portraiture, I showed students about eight images of Picasso's portrait work including Portrait of Marie-Therese and Portrait of Dora Maar. I asked students to pick out anything similar they found in the paintings and they came up with things like wiggly shaped faces, bright colours, faces that were not symmetrical and eyes that looked in different directions. I had them think about why Picasso would make eyes that looked straight and sideways at the same time and their answers surprised me! They said things like "he wanted to be famous", "he was creative", "he wanted to make his work different from everyone else", and the best answer of all: "he wanted to make them look as if their heads were moving". I was so pleased! We also discussed Cubism and how he would draw straight lines in different directions.
2. Now for the drawing part. This was a guided drawing session. However, I made it a point to let my students know that they were not supposed to copy my drawing on the board. We started off by drawing a large wiggly shape for the face. Then, I had the students draw an abstract nose, eyes, mouth and hair. I drew some examples on the board and I also had a handout to support my middle and low ability students which looked similar to this, but without the dice component. I walked around the class making sure that they had all drawn out features that were big enough to paint in and relative to the size of the face. Then students took a ruler and drew straight lines through their portrait in a variety of angles. By this time we had about 20 minutes left until the end of the lesson so we began painting with watercolours. Have a look!
3. In the second lesson we recapped everything we learned about Picasso and before we continued to paint, I stressed the importance of not leaving white spaces, using bright colours and painting even toned colours. This took the entire lesson.
4. In the last lesson, we painted a single colour for the background using tempera paint and when that dried, we outlined it all using a black marker.
5. Then we drew patterns on the face with markers.What do you think of the results?
No comments:
Post a Comment