22 February 2015

Line, Shape and Pattern

This is one of my favourite projects to start off the academic year with. It's minimum prep and very little clean up which leaves you with maximum time to focus on getting to know your students' abilities. The beautiful results are a bonus too!

This lesson is based on line, shape and pattern. I did it with Grade 3 but it can be applied to any grade level.

Materials required:
- square paper
- markers & colour pencils
- pencils, erasers
- thin black markers for outlining

Duration: 3 classes of 80 minutes each

1. Discuss and brainstorm with students about different types of lines (wavy, zig-zag, swirly, straight, etc.). Do the same with basic geometric and organic shapes. Ask them to point out the different lines and shapes they see within the classroom.
2. I gave each student a blanl, square sheet of paper and through verbal instruction only, I asked them to draw five types of lines: a wavy line, a zig zag line, a straight line, a curved line and a loopy line. I told the students that each line must go from one end of the paper to the other. The lines could be drawn in any direction and must overlap/intersect each other.
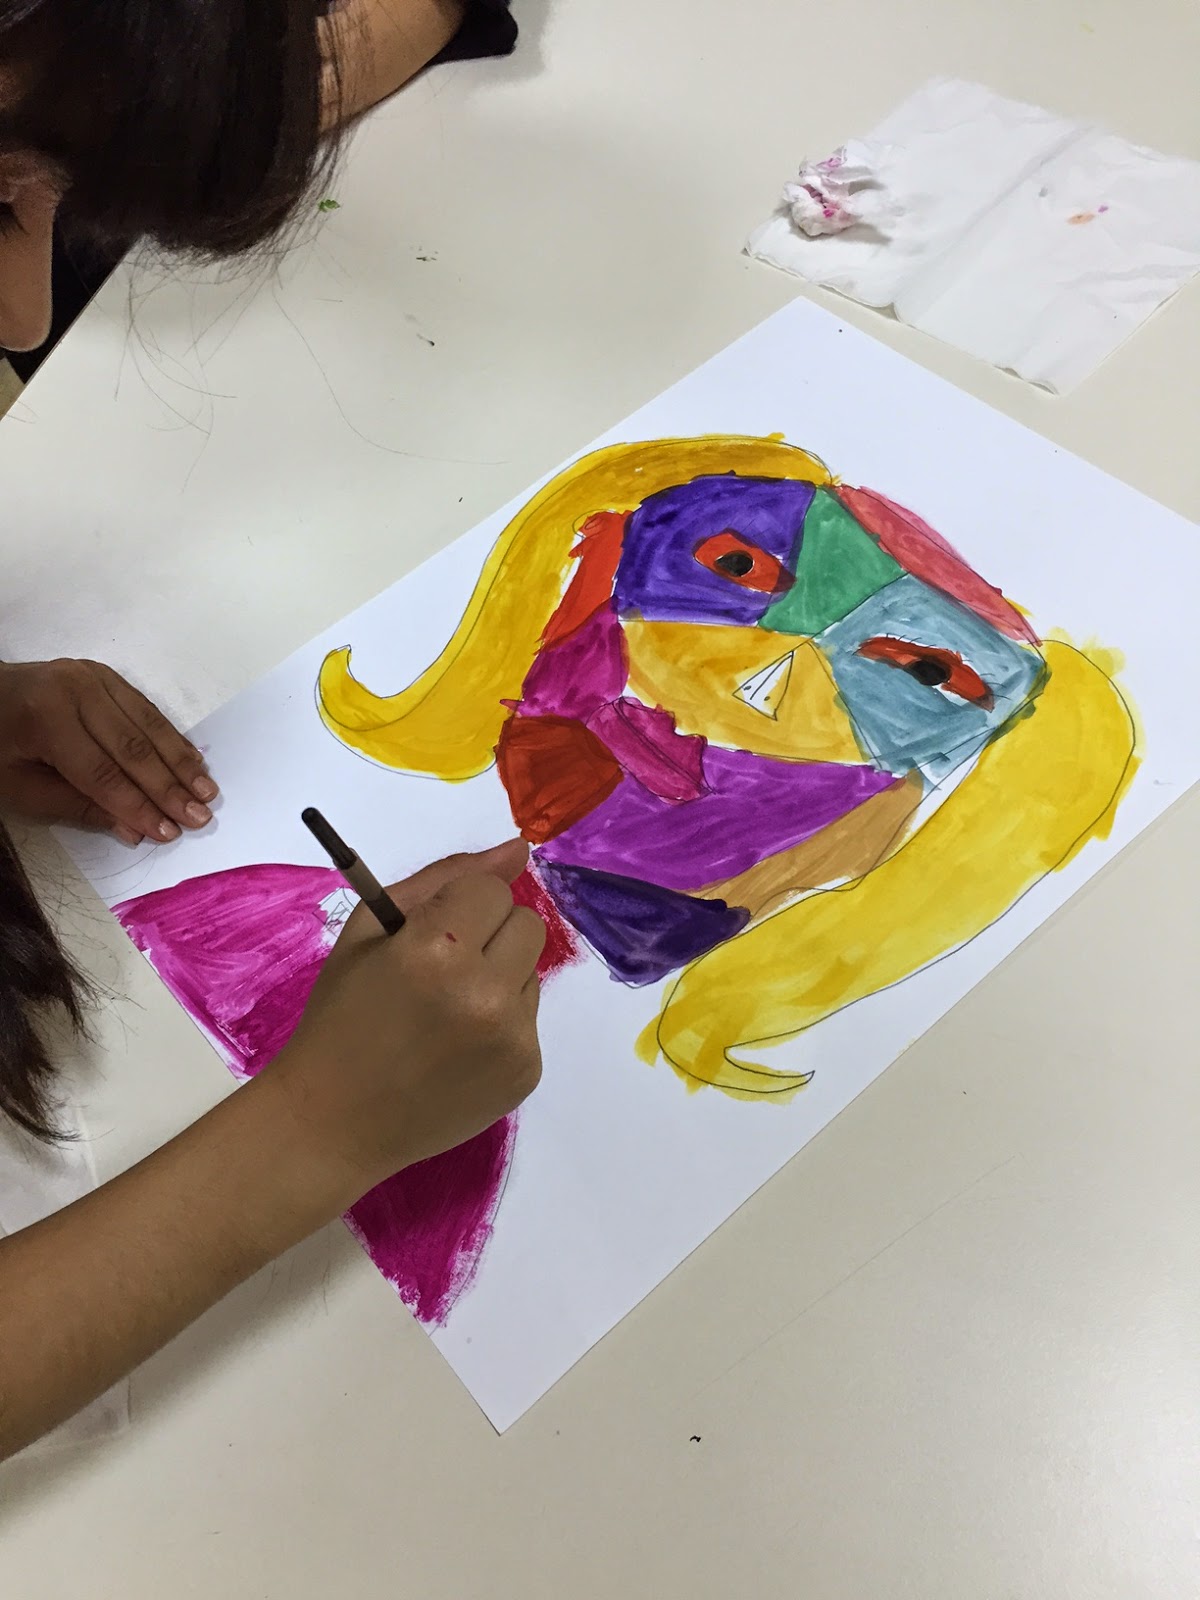
3. Now students had to draw patterns into each section and outline with a fine black marker. This was the end of the first lesson.
Lines & patterns drawn in pencil and outlined with marker
4. Here is the part that the students love - colouring! This was done in the second and third lesson using both colour pencils and markers. I stretched my high abilities by getting them to add tones of light and dark within their patterns.
Just gorgeous!


21 February 2015

Solar System

Grade 2 students were learning about the solar system in Science so I decided to do a large group mural based on the sun & moon. This project required a significant amount of prep work on my behalf but the results were all worth it.

My prep work before the lesson was to put students into groups of 3 or 4 according to ability levels, personalities and friendships. Since there are approximately 300 students in Grade 2, you can well imagine that this was quite a task! I also had to arrange for each group to receive one canvas of 60cm x 60cm which meant securing a budget from the finance department. Always lovely working with them :)

Materials required
- A5 paper
- colour pencils or markers
- acrylic paints, brushes
- a large assortment of craft items such as beads, sequins, fabric, glitter, etc.
- white glue
- hot glue gun (to be used only by the teacher)

Duration: 4 lessons of 80 minutes each

1. First I had the students get into their groups and as a starter activity, had them brainstorm 5 rules that their group would follow. They all came up with rules like respect each other, be kind, help one another, etc. All valid answers.
2. Next, in their groups I gave each student an A5 paper and asked them to draw an abstract sun or moon. I had images on the board to give them ideas of how to make a simple, circular sun abstract. For example, they could draw concentric circles for the sun and triangles for the rays. They came up with pretty good ideas, here are a few.
3. Now it was time for each group to look at each other's drawings and vote on whose drawing was the best. The drawing with the most votes would get selected and drawn onto the canvas for the final piece. You might witness a few disappointed faces but as long as you tell them that this is a team effort, it's all good! This was the end of the first lesson.
4. After making the final drawing on canvas, it is time to start painting. The students work as a team so each student is painting different areas of the canvas. This process took me about 2 lessons as I had to tell the kids over and over to keep their colours vibrant and paint a flat tone of colour.
5. In the fourth lesson, students added embellishments such as beads, sequins, fabric, glitter, etc. Those items that were not sticking well with white glue such as pearls, I stuck down with a hot glue gun.

Enjoy the results!
Each 'square' is 60cm x 60cm. Can you guess how big it is?

Jackson Pollock Abstract Art

Jackson Pollock inspired art lessons are always fun for the kids, minimum prep for the teacher with great results. It's a win-win situation except for the fact that it's crazy messy so make sure you and your students are wearing fully covered aprons before you begin. I chose to do a mini lesson with oil pastels first to reinforce the concept of abstract and then follow up with splash painting for the main activity.

Materials required for the mini lesson:
- glue
- A4 paper
- oil pastels 
- a small section of a Pollock painting for each student

Duration: 1 lesson of 80 minutes

The mini lesson:
1.  To gain an introduction to the artist and his style of painting, I showed the students a video clip from YouTube. While they were watching, I asked them to look for two things: (a) How is Pollock painting? (b) Where is he painting? 
2. After watching the video, we discussed the two questions and other key facts about the artist and looked at more examples of his work. What also talked about the lines, shapes and colours he used.
3. I then explained to the students that we would each receive a small section of his painting and without seeing the entire painting beforehand, we would have to predict what the rest of the painting looked like. 
The entire Pollock painting, The Moon Woman Cuts the Circle -  I showed them this image at the end of the lesson.
4. To make this process clearer to the students I gave them a demonstration. First, glue down the section anywhere on the A4 paper. Then, with oil pastels, continue the lines, shapes and colours as if you were completing Pollock's painting for him. Stress on the importance of filling up the white spaces and using colours similar to those of the artist.

The small section I gave the students
 5. Enjoy the results!


Before I taught the lesson I had a feeling that I would end up with a bunch of scribbles but I was honestly surprised with such beautiful results!

Materials required for the main activity:
- tempera paint
- A3 paper
- brushes, water
- an assortment of stamping/texture tools such as sponges, rollers, stamps, etc.

Duration: 1 lesson of 80 minutes  

The main activity:
1. Now that we already had basic knowledge about Pollock, we recapped key characteristics of his work to refresh our memories.
2. On a white A3 paper, I had the students flat paint the background first in one colour only with a large brush. This lesson coincided with the UAE's Independence Day celebrations so therefore the kids had a limited palette. They could only use the colours of the UAE flag (red, black, green or white). I suppose you could start by giving them coloured paper so that they won't have to paint a background but I love the texture and strokes that can be seen on a hand painted background. 
3. With a small brush and stamping tools, the students created random shapes and patterns similar to the style of the artist. Here the kids had free range in terms of design and could use any colour of the flag so long as it wasn't the same colour as their background. I had the kids use rollers, stamps and found objects such as forks, sticks and sponges to create variety within their work.
4. Now for the messy part! I covered the hallway floor with plastic and had the kids place their work on the floor adjacent to each other. We stood in a circle around the paintings and I demonstrated how to drip, splash and splatter the paint. The students took it in turns to splash (3 at a time). The squeals of excitement were priceless although I had to tell them to keep it down quite a few times! Left them to dry overnight and it's all done! Would you do this with your students?


Starry Night


Starry Night by Van Gogh has been a source of inspiration for many art teachers. My Grade 1 students created their own versions of this famous work of art by recreating the textured strokes using oil pastels and inks. When I started planning out this project it all seemed a bit daunting and I could never have done it without the support of Zilker Elementary and this awesome step-by-step downloadable powerpoint from Mrs.Brown - Thank you both so much! 
Materials required:
- A3 paper
- oil pastels
- inks
- pencils, erasers

Duration: 3 lessons of 80 minutes each

1. In the first lesson we identified Van Gogh as an artist and where he was from. What I loved about teaching in an international school is that you will almost always have a student who is from the same country as the artist in question which makes the kids even more excited. We looked at many of his paintings and discussed the movement of his brush strokes. Then we studied one of his most famous works of art "Starry Night." I wanted the kids to guess the name of the painting themselves so guiding questions included 'what can you see in the painting' - Of course you can't blame the kids for thinking that the cyprus tree was the Burj Khalifa! Other questions I asked were 'what name can you give it?', 'What kind of lines can you see? What shapes? Colours?" I made sure to show students close up shots of the painting so that they can clearly recognize the brush strokes and colours.
2. Before starting to draw, I showed students a finished example of the project so that they could gauge what materials they would be using, the time frame, and also that this would be a guided drawing session.
3. Using Mrs.Brown's powerpoint as a guide, my co-teacher Maggie and I created a 10 minute video tutorial for the students to follow. The video helps because we could pause and play whenever we needed to. 4.  By the end of the first lesson, the students managed to complete the drawing component and make the stars. 
5. In the second lesson it was time to focus on the sky and tree. After recapping the brush strokes and colours, the kids watched my video tutorial and began to fill in the sky using short strokes that were close to each other, following the shape of the swirls. Luckily, my oil pastels have a fairly large range of cool colours (navy, prussian, cobalt, ultramarine, turquoise and sky blue) so students were able to choose their colours freely. For the tree I limited the colours to a variety of greens, browns and black. Make sure they are pressing down hard enough with the oil pastel so that the ink can resist it.
6. The third lesson saw the kids draw and colour in the houses. I told them that they could make their houses as colourful as they wanted. This is what most of the work looked like before the ink wash. 
Photo courtesy of Mrs.Brown
7. Then they watched my video tutorial on how to apply the inks and we were done!

I LOVE the sky on this one!
I love doing this project with the kids because in spite of everyone doing a guided drawing session on the same topic, the end result for each child's artwork is so unique with their style of applying the oil pastels and colour choices for the inks.
If I had to do this project again, I would love to read a storybook about Van Gogh as a starter activity. Any recommendations?

20 February 2015

Line, Shape, Colour and Pattern

For every grade level, the academic year kicks off with the first unit of study based on the elements of art. After learning about line, shape, tone, pattern and colour individually, this project was a culmination of the five elements into a very large, collaborative piece of work. The project also coincided with the UAE's independence day celebrations in school and therefore the artwork reflects the colours of the UAE flag (red, green, white and black). Each student painted a strip individually and then later, all the strips were glued onto backing paper.

Materials required:
- large strips of paper (approx. 8" x 40")
- red, green, white and black tempera paints
- brushes, water
- pencils

Duration: 2 lessons of 80 minutes each

Tip: Before you begin the lesson you may need to think logistically about how far the students are seated since the papers are very long. I spread out my students on the tables and a few on the floor.
Also, make sure you have cut up extra strips so if anyone finishes early, they can paint another strip. The more painted strips you have, the larger your artwork will be.
Keep a designated area to allow the strips to dry. The drying racks in my classroom were not big enough so I kept them on the floor outside in the hallway instead.

1. Keeping the strip horizontal, each student drew 2 types of lines on their paper from one end to the other for example, straight, wavy, zig zag, etc. I asked them to be careful not to draw them too close together.
2. Then they chose any 3 colours out of the 4 colours of the UAE flag and painted inside the lines they drew. I gave a demonstration for this as I wanted to the students to paint an even, flat tone of colour and not leave any white spaces. This was all they had to do during this lesson so the minute one student finished, I gave them another strip to paint in a different colour combination.
3. In the second lesson, it was time to paint the patterns. In my demonstration, I made sure to mention that the colour they use for the patterns should not be the same as the background. So if their background is red, then they could use green, white and/or black for the patterns. I also showed them how to use a thick and thin brush for more detailed patterns. We discussed what types of lines and shapes we could make patterns with. Similar to the first lesson, there were a lot of students who finished quickly and so I just gave them another painted strip.
4. After the strips dried, I got my classroom assistant to glue all of them down onto backing paper. We had about 400 strips in total so it took a while but the results were incredible! What do you think?


Can you find a black-red-green strip that does not have any patterns on it? Whoops!
Have you done a project like this before? Let's hear your thoughts!

Warm and Cool Hands

This was mainly an extension activity to reinforce the concept of warm and cool colours for my Grade 2 students. I got the idea from here. Thank you so much Kathy Barbro for sharing this easy, no mess activity!

Materials required:
- markers
- pre-made templates of concentric squares

Duration: 1 lesson of 80 minutes

1. Since the students already knew about warm & cool colours, all they had to do was trace their hand onto the template and start colouring. The lower ability students chose two warm and two cool colours while the middle & high ability chose 3 or more colours each.
2. Tip: Keep a few extra templates on hand as you will most likely get a few students who have coloured in the "wrong" area.

If I had to do this project again, I would most likely do away with the template and have the kids draw their own concentric organic/geometric shapes. I think they look great on display though!

Some variations using different shapes

Mixed Media Chameleons

Perhaps this is my favourite Grade 3 art project because the results are always stunning and the kids LOVE chameleons! This is a great cross-curricular project that ties science into art since the students talk about key characteristics of chameleons. The end result is an ink/oil pastel resist technique.

Materials required:
- A3 paper
- pencils, erasers
- oil pastels
- inks (can use watercolours as well but I prefer the vibrancy of ink)

Duration: 3-4 lessons of 80 minutes each

1. I show students a finished example of the project so that they get an idea of what is expected. We began by talking about chameleons, where they live, why they change colour, how their eyes move. More importantly, we discussed what basic shapes can be used to draw their body such as triangle for the head, oval for body, etc. When they start to draw, I emphasized two points: (a) draw big & (b) draw light. I asked the students why they were supposed to draw big and light and they all came up with reasons like "so we can see it clearly, we have enough space to add colours and patterns, so that we can erase it easily, etc." I love how their logical minds work!
2. For the low ability students I had a step-by-step drawing guide. As for my high abilities, they used photographs as a reference and could draw a chameleon from different angles.
Step-by-step drawing guide
3. After the chameleon drawing was complete, students had to draw patterns on the body and develop a background. I displayed an image on the board with different kinds of leaves, flowers, etc. Of course students were not limited to this and were welcome to use their own ideas as well. This was the end of the first lesson. 


4. As a starter for the second lesson, we watched a small video clip of how chameleons change colour. The kids loved it! During this lesson, we outlined the drawing in oil pastels and coloured in a few, selected areas only. I think the key aspect here is telling them to press down hard with their pastel as you will always get some students who are rushing to finish and their outlines are too lightly done to withstand the ink which will be applied on later. What do you think of the work in progress?


5. In the third lesson, we began using inks. The kids love how the resist technique works and I think it is important to question them about why oil pastel and ink resist each other as it makes them think scientifically about the materials they use.


6. In the fourth lesson, students outlined their work with a black marker. The idea here is to tell them to outline around the oil pastel instead of over it. Don't they look gorgeous?


Picasso Portraits

Picasso and his cubist style portraits are a popular subject for art teachers and my Grade 1 students learn about him every year. The lesson objectives focus on identifying abstract and realistic portraits, recognizing key facts about the artist's work and finally creating an abstract, cubist style portrait.

Materials required:
- A3 paper
- Pencils, erasers, rulers
- watercolours, brushes, water
- markers
- gold & silver markers
- tempera paint for the background

Duration: 3 lessons of 80 minutes each

1. I started off the lesson by introducing Picasso, where he was from and why he was famous. We talked about the meaning of 'portrait' and 'abstract'. Since this was a lesson on portraiture, I showed students about eight images of Picasso's portrait work including Portrait of Marie-Therese and Portrait of Dora Maar. I asked students to pick out anything similar they found in the paintings and they came up with things like wiggly shaped faces, bright colours, faces that were not symmetrical and eyes that looked in different directions. I had them think about why Picasso would make eyes that looked straight and sideways at the same time and their answers surprised me! They said things like "he wanted to be famous", "he was creative", "he wanted to make his work different from everyone else", and the best answer of all: "he wanted to make them look as if their heads were moving". I was so pleased! We also discussed Cubism and how he would draw straight lines in different directions.
2. Now for the drawing part. This was a guided drawing session. However, I made it a point to let my students know that they were not supposed to copy my drawing on the board. We started off by drawing a large wiggly shape for the face. Then, I had the students draw an abstract nose, eyes, mouth and hair. I drew some examples on the board and I also had a handout to support my middle and low ability students which looked similar to this, but without the dice component. I walked around the class making sure that they had all drawn out features that were big enough to paint in and relative to the size of the face. Then students took a ruler and drew straight lines through their portrait in a variety of angles. By this time we had about 20 minutes left until the end of the lesson so we began painting with watercolours. Have a look!


3. In the second lesson we recapped everything we learned about Picasso and before we continued to paint, I stressed the importance of not leaving white spaces, using bright colours and painting even toned colours. This took the entire lesson.


4. In the last lesson, we painted a single colour for the background using tempera paint and when that dried, we outlined it all using a black marker. 
5. Then we drew patterns on the face with markers.What do you think of the results?


19 February 2015

Monet Water Lilies

Who doesn't love a Claude Monet art project? There are many versions of Monet inspired projects out there and the idea for my Grade 2 students stemmed from here. The students painted the water and lily pad first and then created a 3D flower using tissue and construction paper.

Materials required:
- A3 paper cut into a square (I just thought it would look nicer that way)
- leftover rectangular sheets of paper from the A3 sheets that were cut
- acrylic paints (white, red, blue & purple for the water and green, yellow & blue for the lily pad)
- flat brushes
- newspaper
- pre-cut circles of tissue paper in different colours
- pre-drawn circle on construction paper that is smaller than the tissue paper circle
- white glue
- scissors
- diamond beads for the centre of the flower (optional)

Duration: 2 lessons of 80 minutes each

1. To gain an introduction to the artist and his work, we read the story "The Magical Garden of Claude Monet" by Lawrence Anholt. We looked at a variety of Monet's work and focused on his palette of colours and brush strokes. Guiding questions included "In which direction is his brush moving?" "What time of the day do you think it is?" "Name all the colours you can see in the water". As a whole class, we created a huge list on the board of all the colours Monet would use to paint water.
2. We started off by drawing a water lily on our square paper. I gave students a handout with different shaped lily pads that catered to the different ability levels in my class. Once the drawing was done, I collected all their sheets and kept them on my desk.
3. I then gave each student a sheet of newspaper, a small palette with red, white, blue and purple paint, a flat brush, and a rectangular sheet of paper. I told them to start mixing 2 or 3 colours together and see if they could make the same colours as Monet did in his paintings. The trick was to tell them not to wash their brushes in water when they wanted to mix different colours. Instead, I had them clean their brushes on the newspaper. In my opinion this is the most important part if you want beautiful results as you can retain strokes of colour with acrylic paint and the different hues continue to mix even on the paper. When they painted about 5 - 7 different colour swatches, I gave back their drawings of the lily pad and told them to paint the water in with particular emphasis on using brush strokes in the style of the artist. This was the end of the first lesson.


4. Next lesson, it's time to paint the lily pad and make the 3D lily with tissue paper. I started making the lily first as I didn't want the tables to be messy with paint. A purely logistical move on my part! My co-teacher Maggie and myself created a step-by-step video tutorial which is similar to one I found on youtube, the only difference is that we used a simple circle shape and white glue in place of the stapler. We also added a base circle of construction paper to give it more stability and a diamond bead at the centre (for an added 'wow' factor!). I collected all the flowers when they were done and put them into a box.
5. I then gave a demonstration on how to paint the lily pad. I showed the students how they could create a different effect with acrylic paint by dabbing their brush up and down. I suppose the same effect could also be achieved with a sponge. Similar to the first lesson, a newspaper was given to each student to clean their brush if they needed to.
6. Lastly, I gave the flowers back to them and they glued it down with white glue. Bear in mind the paint is still wet at this point but it's not a problem as acrylic paint acts as glue too. Enjoy the beautiful results! Don't they look fab?


How have you done your Monet project? Leave a comment below!